本页还没有译文
本页 56 段还没译成简体中文,下面显示的是英文原文。Build a User Management App with Expo React Native
还没翻译译自英文(supabase.com)本页 56 段都还没译
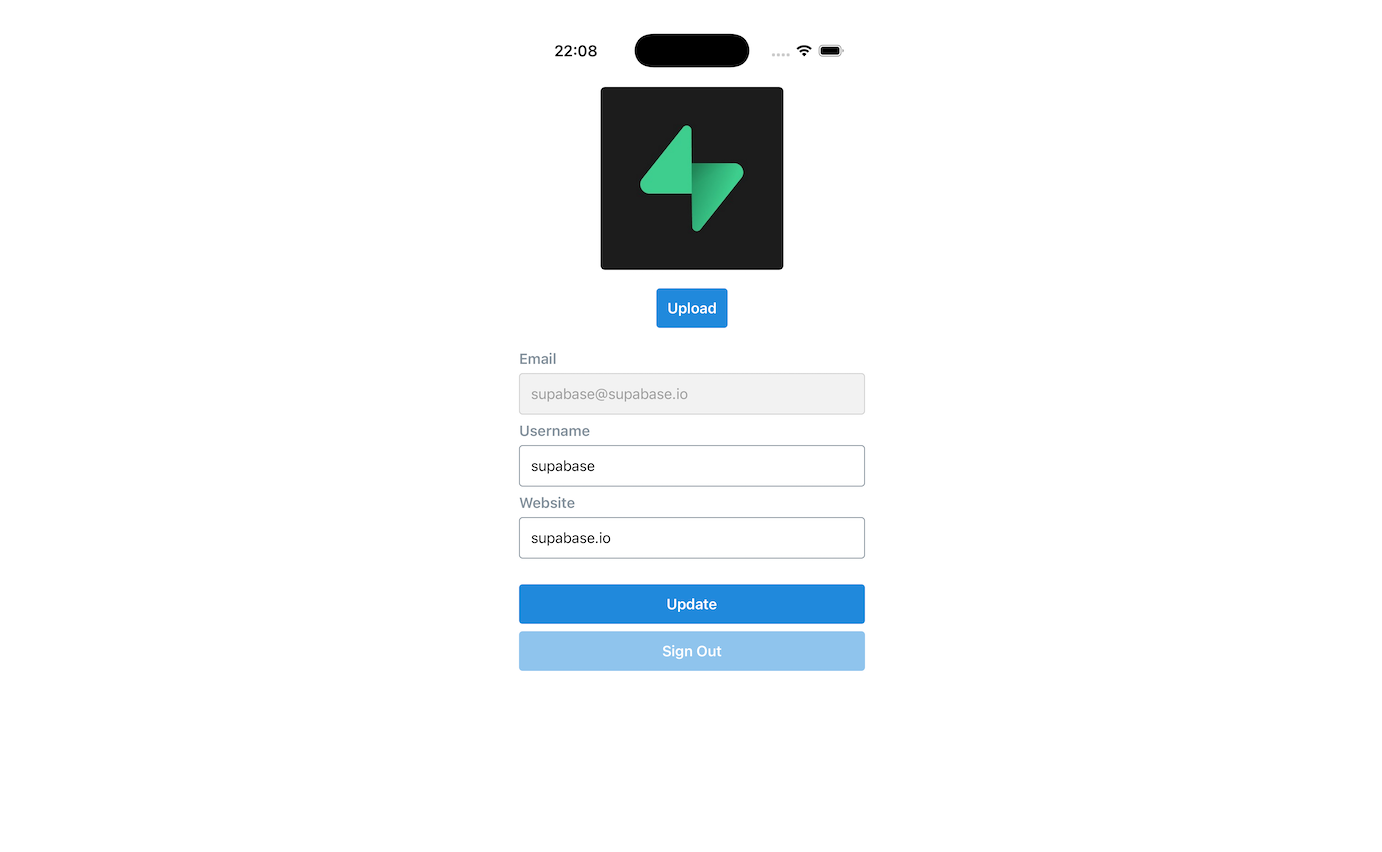
This tutorial demonstrates how to build a basic user management app. The app authenticates and identifies the user, stores their profile information in the database, and allows the user to log in, update their profile details, and upload a profile photo. The app uses:
- Supabase Database - a Postgres database for storing your user data and Row Level Security so data is protected and users can only access their own information.
- Supabase Auth - allow users to sign up and log in.
- Supabase Storage - allow users to upload a profile photo.
Note
If you get stuck while working through this guide, refer to the full example on GitHub.
Project setup
Before you start building you need to set up the Database and API. You can do this by starting a new Project in Supabase and then creating a "schema" inside the database.
Create a project
- Create a new project in the Supabase Dashboard.
- Enter your project details.
- Wait for the new database to launch.
Set up the database schema
Now set up the database schema. You can use the "User Management Starter" quickstart in the SQL Editor, or you can copy/paste the SQL from below and run it.
- Go to the SQL Editor page in the Dashboard.
- Click User Management Starter under the Reference > Examples tab.
- Click Run.
Note
You can pull the database schema down to your local project by running the db pull command. Read the local development docs for detailed instructions.
supabase link --project-ref <project-id>
# You can get <project-id> from your project's dashboard URL: https://supabase.com/dashboard/project/<project-id>
supabase db pull
Note
When working locally you can run the following command to create a new migration file:
supabase migration new user_management_starter-- Create a table for public profiles
create table profiles (
id uuid references auth.users not null primary key,
updated_at timestamp with time zone,
username text unique,
full_name text,
avatar_url text,
website text,
constraint username_length check (char_length(username) >= 3)
);
-- Grant the privileges roles need
GRANT SELECT ON public.profiles TO anon;
GRANT SELECT, INSERT, UPDATE ON public.profiles TO authenticated;
-- Set up Row Level Security (RLS)
-- See https://supabase.com/docs/guides/database/postgres/row-level-security for more details.
alter table profiles
enable row level security;
create policy "Public profiles are viewable by everyone." on profiles
for select using (true);
create policy "Users can insert their own profile." on profiles
for insert with check ((select auth.uid()) = id);
create policy "Users can update own profile." on profiles
for update using ((select auth.uid()) = id);
-- This trigger automatically creates a profile entry when a new user signs up via Supabase Auth.
-- See https://supabase.com/docs/guides/auth/managing-user-data#using-triggers for more details.
create function public.handle_new_user()
returns trigger
set search_path = ''
as $$
begin
insert into public.profiles (id, full_name, avatar_url)
values (new.id, new.raw_user_meta_data->>'full_name', new.raw_user_meta_data->>'avatar_url');
return new;
end;
$$ language plpgsql security definer;
create trigger on_auth_user_created
after insert on auth.users
for each row execute procedure public.handle_new_user();
-- Set up Storage!
insert into storage.buckets (id, name)
values ('avatars', 'avatars');
-- Set up access controls for storage. Allows downloading object with public key
-- See https://supabase.com/docs/guides/storage/security/access-control#policy-examples for more details.
create policy "Avatar images are publicly accessible." on storage.objects
for select using (bucket_id = 'avatars' and storage.allow_any_operation(array['object.get_authenticated_info', 'object.get_authenticated']));
create policy "Anyone can upload an avatar." on storage.objects
for insert with check (bucket_id = 'avatars');
create policy "Anyone can update their own avatar." on storage.objects
for update using ((select auth.uid()) = owner) with check (bucket_id = 'avatars');Get API details
To interact with data in database tables, you use the client libraries that wrap the auto-generated Data API endpoints, authenticating using the Project URL and key from the project Connect dialog.
Project URL: https://<project-ref>.supabase.co (find yours in the dashboard)
Publishable key: sb_publishable_... (find yours in the dashboard)
Note
See API keys for a full explanation of all key types, their uses, and where to find them.
Building the app
Start by building the React Native app from scratch.
Initialize a React Native app
Use expo to initialize
an app called expo-user-management:
npx create-expo-app -t expo-template-blank-typescript expo-user-management

cd expo-user-management
Then install the additional dependencies:
npx expo install @supabase/supabase-js @react-native-async-storage/async-storageNow create a helper file to initialize the Supabase client using the API URL and the key that you copied earlier.
These variables are safe to expose in your Expo app since Supabase has Row Level Security enabled on your Database.
import { createClient } from '@supabase/supabase-js'
import AsyncStorage from '@react-native-async-storage/async-storage'

const supabaseUrl = process.env.EXPO_PUBLIC_SUPABASE_URL!
const supabasePublishableKey = process.env.EXPO_PUBLIC_SUPABASE_PUBLISHABLE_KEY!

export const supabase = createClient(supabaseUrl, supabasePublishableKey, {
  auth: {
    storage: AsyncStorage as any,
    autoRefreshToken: true,
    persistSession: true,
    detectSessionInUrl: false,
  },
})
If you wish to encrypt the user's session information, you can use aes-js and store the encryption key in Expo SecureStore. The aes-js library is a reputable JavaScript-only implementation of the AES encryption algorithm in CTR mode. A new 256-bit encryption key is generated using the react-native-get-random-values library. This key is stored inside Expo's SecureStore, while the value is encrypted and placed inside AsyncStorage.
Make sure that:
- You keep the
expo-secure-storage,aes-jsandreact-native-get-random-valueslibraries up-to-date. - Choose the correct
SecureStoreOptionsfor your app's needs. E.g.SecureStore.WHEN_UNLOCKEDregulates when the data can be accessed. - Carefully consider optimizations or other modifications to the above example, as those can lead to introducing subtle security vulnerabilities.
Install the necessary dependencies in the root of your Expo project:
npm install @supabase/supabase-js
npm install @react-native-async-storage/async-storage
npm install aes-js react-native-get-random-values
npm install --save-dev @types/aes-js
npx expo install expo-secure-store
Implement a LargeSecureStore class to pass in as Auth storage for the supabase-js client:
import { createClient } from "@supabase/supabase-js";
import AsyncStorage from "@react-native-async-storage/async-storage";
import * as SecureStore from 'expo-secure-store';
import * as aesjs from 'aes-js';
import 'react-native-get-random-values';

// As Expo's SecureStore does not support values larger than 2048
// bytes, an AES-256 key is generated and stored in SecureStore, while
// it is used to encrypt/decrypt values stored in AsyncStorage.
class LargeSecureStore {
  private async _encrypt(key: string, value: string) {
    const encryptionKey = crypto.getRandomValues(new Uint8Array(256 / 8));

    const cipher = new aesjs.ModeOfOperation.ctr(encryptionKey, new aesjs.Counter(1));
    const encryptedBytes = cipher.encrypt(aesjs.utils.utf8.toBytes(value));

    await SecureStore.setItemAsync(key, aesjs.utils.hex.fromBytes(encryptionKey));

    return aesjs.utils.hex.fromBytes(encryptedBytes);
  }

  private async _decrypt(key: string, value: string) {
    const encryptionKeyHex = await SecureStore.getItemAsync(key);
    if (!encryptionKeyHex) {
      return encryptionKeyHex;
    }

    const cipher = new aesjs.ModeOfOperation.ctr(aesjs.utils.hex.toBytes(encryptionKeyHex), new aesjs.Counter(1));
    const decryptedBytes = cipher.decrypt(aesjs.utils.hex.toBytes(value));

    return aesjs.utils.utf8.fromBytes(decryptedBytes);
  }

  async getItem(key: string) {
    const encrypted = await AsyncStorage.getItem(key);
    if (!encrypted) { return encrypted; }

    return await this._decrypt(key, encrypted);
  }

  async removeItem(key: string) {
    await AsyncStorage.removeItem(key);
    await SecureStore.deleteItemAsync(key);
  }

  async setItem(key: string, value: string) {
    const encrypted = await this._encrypt(key, value);

    await AsyncStorage.setItem(key, encrypted);
  }
}

const supabaseUrl = YOUR_REACT_NATIVE_SUPABASE_URL
const supabasePublishableKey = YOUR_REACT_NATIVE_SUPABASE_PUBLISHABLE_KEY

export const supabase = createClient(supabaseUrl, supabasePublishableKey, {
  auth: {
    storage: new LargeSecureStore(),
    autoRefreshToken: true,
    persistSession: true,
    detectSessionInUrl: false,
  },
});
App styling
You can use the following StyleSheet component in styles/styles.ts to add style to the app:
import { StyleSheet } from 'react-native'

export const appStyles = StyleSheet.create({
  container: {
    marginTop: 40,
    padding: 12,
  },
  verticallySpaced: {
    paddingTop: 4,
    paddingBottom: 4,
    alignSelf: 'stretch',
  },
  mt20: {
    marginTop: 20,
  },
  label: {
    fontSize: 16,
    fontWeight: '600',
    color: '#86939e',
    marginBottom: 6,
  },
  input: {
    borderWidth: 1,
    borderColor: '#86939e',
    borderRadius: 4,
    padding: 12,
    fontSize: 16,
  },
  inputDisabled: {
    backgroundColor: '#f2f2f2',
    borderColor: '#d1d1d1',
    color: '#9e9e9e',
  },
  button: {
    backgroundColor: '#2089dc',
    borderRadius: 4,
    padding: 12,
    alignItems: 'center',
  },
  buttonDisabled: {
    opacity: 0.5,
  },
  buttonText: {
    color: '#fff',
    fontSize: 16,
    fontWeight: '600',
  },
  avatarContainer: {
    alignItems: 'center',
    justifyContent: 'center',
    marginTop: 20,
  },
  avatar: {
    borderRadius: 5,
    overflow: 'hidden',
    maxWidth: '100%',
    marginBottom: 20,
  },
  image: {
    objectFit: 'cover',
    paddingTop: 0,
  },
  noImage: {
    backgroundColor: '#333',
    borderWidth: 1,
    borderStyle: 'solid',
    borderColor: 'rgb(200, 200, 200)',
    borderRadius: 5,
  },
})
Set up a sign-in component
Set up a React Native component to manage sign-ins and sign-ups. Users should be able to sign in with their email and password.
import React, { useState } from 'react'
import { Alert, Text, TextInput, TouchableOpacity, View } from 'react-native'
import { supabase } from '../lib/supabase'
import { appStyles } from '../styles/styles'

export default function Auth() {
  const [email, setEmail] = useState('')
  const [password, setPassword] = useState('')
  const [loading, setLoading] = useState(false)
  const styles = appStyles

  async function signInWithEmail() {
    setLoading(true)
    const { error } = await supabase.auth.signInWithPassword({
      email: email,
      password: password,
    })

    if (error) Alert.alert(error.message)
    setLoading(false)
  }

  async function signUpWithEmail() {
    setLoading(true)
    const { error } = await supabase.auth.signUp({
      email: email,
      password: password,
    })

    if (error) Alert.alert(error.message)
    setLoading(false)
  }

  return (
    <View style={styles.container}>
      <View style={[styles.verticallySpaced, styles.mt20]}>
        <Text style={styles.label}>Email</Text>
        <TextInput
          onChangeText={(text) => setEmail(text)}
          value={email}
          placeholder="email@address.com"
          autoCapitalize="none"
          style={styles.input}
        />
      </View>
      <View style={styles.verticallySpaced}>
        <Text style={styles.label}>Password</Text>
        <TextInput
          onChangeText={(text) => setPassword(text)}
          value={password}
          secureTextEntry={true}
          placeholder="Password"
          autoCapitalize="none"
          style={styles.input}
        />
      </View>
      <View style={[styles.verticallySpaced, styles.mt20]}>
        <TouchableOpacity
          style={[styles.button, loading && styles.buttonDisabled]}
          onPress={() => signInWithEmail()}
          disabled={loading}
        >
          <Text style={styles.buttonText}>Sign in</Text>
        </TouchableOpacity>
      </View>
      <View style={styles.verticallySpaced}>
        <TouchableOpacity
          style={[styles.button, loading && styles.buttonDisabled]}
          onPress={() => signUpWithEmail()}
          disabled={loading}
        >
          <Text style={styles.buttonText}>Sign up</Text>
        </TouchableOpacity>
      </View>
    </View>
  )
}
Note
By default Supabase Auth requires email verification before a session is created for the users. To support email verification you need to implement deep link handling!
While testing, you can disable email confirmation in your project's email auth provider settings.
Account page
After a user signs in, let them edit their profile details and manage their account.
Create a new component for that called Account.tsx.
import { useState, useEffect } from 'react'
import { supabase } from '../lib/supabase'
import { View, Alert, TextInput, Text, TouchableOpacity } from 'react-native'
import Avatar from './Avatar'

// ...


export default function Account({ userId, email }: { userId: string; email?: string }) {
  const [loading, setLoading] = useState(true)
  const [username, setUsername] = useState('')
  const [website, setWebsite] = useState('')
  const [avatarUrl, setAvatarUrl] = useState('')
  const styles = appStyles

  useEffect(() => {
    if (userId) getProfile()
  }, [userId])

  async function getProfile() {
    try {
      setLoading(true)

      let { data, error, status } = await supabase
        .from('profiles')
        .select(`username, website, avatar_url`)
        .eq('id', userId)
        .single()
      if (error && status !== 406) {
        throw error
      }

      if (data) {
        setUsername(data.username)
        setWebsite(data.website)
        setAvatarUrl(data.avatar_url)
      }
    } catch (error) {
      if (error instanceof Error) {
        Alert.alert(error.message)
      }
    } finally {
      setLoading(false)
    }
  }

  async function updateProfile({
    username,
    website,
    avatar_url,
  }: {
    username: string
    website: string
    avatar_url: string
  }) {
    try {
      setLoading(true)

      const updates = {
        id: userId,
        username,
        website,
        avatar_url,
        updated_at: new Date(),
      }

      let { error } = await supabase.from('profiles').upsert(updates)

      if (error) {
        throw error
      }
    } catch (error: any) {
      Alert.alert(error.message)
    } finally {
      setLoading(false)
    }
  }

  return (
    <View style={styles.container}>
      <View>

        // ...

        <Text style={styles.label}>Email</Text>
        <TextInput
          value={email ?? ''}
          editable={false}
          selectTextOnFocus={false}
          style={[styles.input, styles.inputDisabled]}
        />
      </View>
      <View style={styles.verticallySpaced}>
        <Text style={styles.label}>Username</Text>
        <TextInput
          value={username || ''}
          onChangeText={(text) => setUsername(text)}
          style={styles.input}
        />
      </View>
      <View style={styles.verticallySpaced}>
        <Text style={styles.label}>Website</Text>
        <TextInput
          value={website || ''}
          onChangeText={(text) => setWebsite(text)}
          style={styles.input}
        />
      </View>

      <View style={[styles.verticallySpaced, styles.mt20]}>
        <TouchableOpacity
          style={[styles.button, loading && styles.buttonDisabled]}
          onPress={() => updateProfile({ username, website, avatar_url: avatarUrl })}
          disabled={loading}
        >
          <Text style={styles.buttonText}>{loading ? 'Loading ...' : 'Update'}</Text>
        </TouchableOpacity>
      </View>

      <View style={styles.verticallySpaced}>
        <TouchableOpacity style={styles.button} onPress={() => supabase.auth.signOut()}>
          <Text style={styles.buttonText}>Sign Out</Text>
        </TouchableOpacity>
      </View>
    </View>
  )
}
Launch!
Now that you have all the components in place, update App.tsx:
import { useState, useEffect } from 'react'
import { supabase } from './lib/supabase'
import Auth from './components/Auth'
import Account from './components/Account'
import { View } from 'react-native'

export default function App() {
  const [userId, setUserId] = useState<string | null>(null)
  const [email, setEmail] = useState<string | undefined>(undefined)

  useEffect(() => {
    supabase.auth.getClaims().then(({ data: { claims } }) => {
      if (claims) {
        setUserId(claims.sub)
        setEmail(claims.email)
      }
    })

    supabase.auth.onAuthStateChange(async (_event, _session) => {
      const {
        data: { claims },
      } = await supabase.auth.getClaims()
      if (claims) {
        setUserId(claims.sub)
        setEmail(claims.email)
      } else {
        setUserId(null)
        setEmail(undefined)
      }
    })
  }, [])

  return <View>{userId ? <Account key={userId} userId={userId} email={email} /> : <Auth />}</View>
}
Once that's done, run this in a terminal window:
npm startAnd then press the appropriate key for the environment you want to test the app in and you should see the completed app.
Bonus: Profile photos
Every Supabase project is configured with Storage for managing large files like photos and videos.
Additional dependency installation
You need an image picker that works on the environment you are building the project for, this example uses expo-image-picker.
npx expo install expo-image-pickerCreate an upload widget
Create an avatar for the user so that they can upload a profile photo. Start by creating a new component:
import { useState, useEffect } from 'react'
import { supabase } from '../lib/supabase'
import { View, Alert, Image, Text, TouchableOpacity } from 'react-native'
import * as ImagePicker from 'expo-image-picker'
import { appStyles } from '../styles/styles'

interface Props {
  size: number
  url: string | null
  onUpload: (filePath: string) => void
}

export default function Avatar({ url, size = 150, onUpload }: Props) {
  const [uploading, setUploading] = useState(false)
  const [avatarUrl, setAvatarUrl] = useState<string | null>(null)
  const avatarSize = { height: size, width: size }
  const styles = appStyles

  useEffect(() => {
    if (url) downloadImage(url)
  }, [url])

  async function downloadImage(path: string) {
    try {
      const { data, error } = await supabase.storage.from('avatars').download(path)

      if (error) {
        throw error
      }

      const fr = new FileReader()
      fr.readAsDataURL(data)
      fr.onload = () => {
        setAvatarUrl(fr.result as string)
      }
    } catch (error: any) {
      console.log('Error downloading image: ', error.message)
    }
  }

  async function uploadAvatar() {
    try {
      setUploading(true)

      const result = await ImagePicker.launchImageLibraryAsync({
        mediaTypes: ImagePicker.MediaTypeOptions.Images, // Restrict to only images
        allowsMultipleSelection: false, // Can only select one image
        allowsEditing: true, // Allows the user to crop / rotate their photo before uploading it
        quality: 1,
        exif: false, // We don't want nor need that data.
      })

      if (result.canceled || !result.assets || result.assets.length === 0) {
        console.log('User cancelled image picker.')
        return
      }

      const image = result.assets[0]
      console.log('Got image', image)

      if (!image.uri) {
        throw new Error('No image uri!') // Realistically, this should never happen, but just in case...
      }

      const arraybuffer = await fetch(image.uri).then((res) => res.arrayBuffer())

      const fileExt = image.uri?.split('.').pop()?.toLowerCase() ?? 'jpeg'
      const path = `${Date.now()}.${fileExt}`
      const { data, error: uploadError } = await supabase.storage
        .from('avatars')
        .upload(path, arraybuffer, {
          contentType: image.mimeType ?? 'image/jpeg',
        })

      if (uploadError) {
        throw uploadError
      }

      onUpload(data.path)
    } catch (error: any) {
      if (error) {
        Alert.alert(error.message)
      } else {
        throw error
      }
    } finally {
      setUploading(false)
    }
  }

  return (
    <View style={styles.avatarContainer}>
      {avatarUrl ? (
        <Image
          source={{ uri: avatarUrl }}
          accessibilityLabel="Avatar"
          style={[avatarSize, styles.avatar, styles.image]}
        />
      ) : (
        <View style={[avatarSize, styles.avatar, styles.noImage]} />
      )}
      <View>
        <TouchableOpacity
          style={[styles.button, uploading && styles.buttonDisabled]}
          onPress={uploadAvatar}
          disabled={uploading}
        >
          <Text style={styles.buttonText}>{uploading ? 'Uploading ...' : 'Upload'}</Text>
        </TouchableOpacity>
      </View>
    </View>
  )
}
Add the new widget
And then add the widget to the Account page:
import { useState, useEffect } from 'react'
import { supabase } from '../lib/supabase'
import { View, Alert, TextInput, Text, TouchableOpacity } from 'react-native'
import Avatar from './Avatar'
import { appStyles } from '../styles/styles'

export default function Account({ userId, email }: { userId: string; email?: string }) {
  const [loading, setLoading] = useState(true)
  const [username, setUsername] = useState('')
  const [website, setWebsite] = useState('')
  const [avatarUrl, setAvatarUrl] = useState('')
  const styles = appStyles

  useEffect(() => {
    if (userId) getProfile()
  }, [userId])

  async function getProfile() {
    try {
      setLoading(true)

      let { data, error, status } = await supabase
        .from('profiles')
        .select(`username, website, avatar_url`)
        .eq('id', userId)
        .single()
      if (error && status !== 406) {
        throw error
      }

      if (data) {
        setUsername(data.username)
        setWebsite(data.website)
        setAvatarUrl(data.avatar_url)
      }
    } catch (error) {
      if (error instanceof Error) {
        Alert.alert(error.message)
      }
    } finally {
      setLoading(false)
    }
  }

  async function updateProfile({
    username,
    website,
    avatar_url,
  }: {
    username: string
    website: string
    avatar_url: string
  }) {
    try {
      setLoading(true)

      const updates = {
        id: userId,
        username,
        website,
        avatar_url,
        updated_at: new Date(),
      }

      let { error } = await supabase.from('profiles').upsert(updates)

      if (error) {
        throw error
      }
    } catch (error: any) {
      Alert.alert(error.message)
    } finally {
      setLoading(false)
    }
  }

  return (
    <View style={styles.container}>
      <View>
        <Avatar
          size={200}
          url={avatarUrl}
          onUpload={(url: string) => {
            setAvatarUrl(url)
            updateProfile({ username, website, avatar_url: url })
          }}
        />
      </View>
      <View style={[styles.verticallySpaced, styles.mt20]}>
        <Text style={styles.label}>Email</Text>
        <TextInput
          value={email ?? ''}
          editable={false}
          selectTextOnFocus={false}
          style={[styles.input, styles.inputDisabled]}
        />
      </View>
      <View style={styles.verticallySpaced}>
        <Text style={styles.label}>Username</Text>
        <TextInput
          value={username || ''}
          onChangeText={(text) => setUsername(text)}
          style={styles.input}
        />
      </View>
      <View style={styles.verticallySpaced}>
        <Text style={styles.label}>Website</Text>
        <TextInput
          value={website || ''}
          onChangeText={(text) => setWebsite(text)}
          style={styles.input}
        />
      </View>

      <View style={[styles.verticallySpaced, styles.mt20]}>
        <TouchableOpacity
          style={[styles.button, loading && styles.buttonDisabled]}
          onPress={() => updateProfile({ username, website, avatar_url: avatarUrl })}
          disabled={loading}
        >
          <Text style={styles.buttonText}>{loading ? 'Loading ...' : 'Update'}</Text>
        </TouchableOpacity>
      </View>

      <View style={styles.verticallySpaced}>
        <TouchableOpacity style={styles.button} onPress={() => supabase.auth.signOut()}>
          <Text style={styles.buttonText}>Sign Out</Text>
        </TouchableOpacity>
      </View>
    </View>
  )
}
Now run the prebuild command to get the application working on your chosen platform.
npx expo prebuildAt this stage you have a fully functional application!